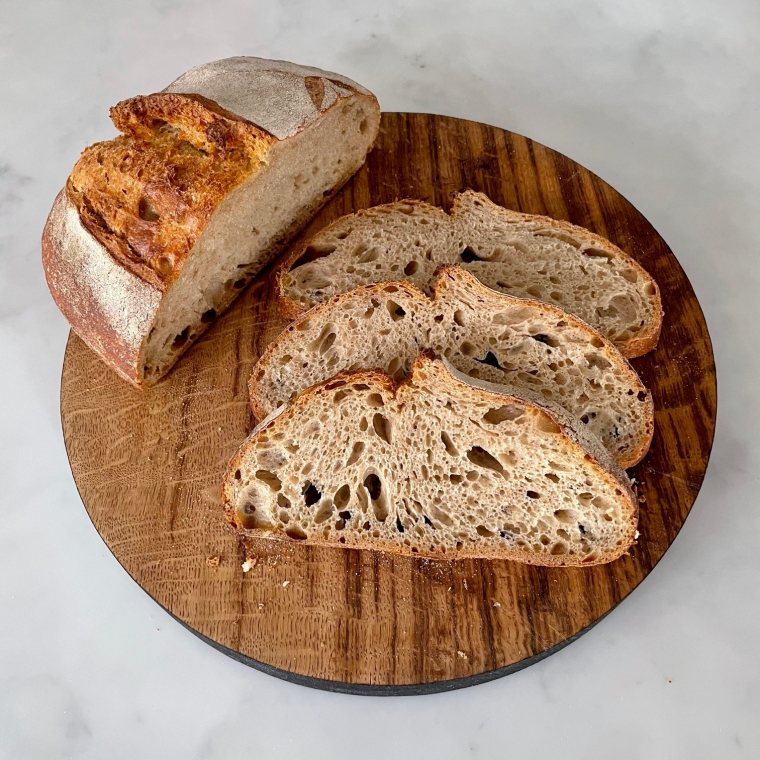
Heritage Sourdough
Recipe by Marie Lester
When it comes to baking sourdough, spelt is special. And you need to know a little about it before you begin.
Spelt contains a different mix of gluten to wheat. It has more gliadins and less glutenins. The gliadins make the dough soft and extensible - which means it stretches out a long way. The glutenins in dough are what make it elastic (what makes it ping back again after stretching). Spelt has a low amount of glutenin and therefore low elasticity. This makes the resulting bread easier to digest for some people but presents challenges to the baker who uses a high proportion of spelt.
Heritage flour has 75% spelt, and 25% emmer and einkorn.Because of spelt's extensibility, this recipe mixes the flour, water and starter at the same time (in a fermentolyse) rather than mixing the flour and water first (an autolyse) which would develop the extensibility of the dough even further.
Use the amount of water stated in the recipe. Don't be tempted to add more in Step 1. The protein in the flour needs time to hydrate properly and if you add more than the stated amount you could weaken the dough and affect the rise you get in your final bake (oven spring).
As the gluten is fragile the dough requires less mixing time. Keep all mixing to a minimum (stick to the recommended rest times in the recipe if you can).
The rest times between coil folds are short (30 minutes) to keep the dough manageable for the home baker. This also takes into account the shorter fermentation time of the dough. And the last part of the fermentation at room temperature takes place in the banneton.
Our organic heritage flour is stoneground. The resulting bread will not get as much of a rise as a bread made with roller-milled flour.
By following these tips and this recipe, you can make amazing breads.
Please note the temperature in your kitchen. If your kitchen is hotter or colder than 21°C -22°C, you may need to adjust the resting times in this recipe.
Ingredients:
- 350g Organic Sharpham Park Heritage flour
- 235g water (leave 245g of water in a jug overnight to allow any chlorine to evaporate)
- 75g ripe starter ('ripe' means thick, bubbly and smelling good) -Click here for our sourdough starter recipe.
- 8g salt + 10g water
- Brown or white rice flour, or fine semolina to flour the bench/dough
Essential EquipmentThe following list encompasses everything you will need to made a lovely sourdough bread using this recipe.- Digital scales (weigh everything including the water)
- Large mixing bowl
- Clean tea towel or mixing bowl cover
- Dough scraper (for use in the bowl)
- Bench knife (for use on your work surface)
- 500g capacity wicker banneton basket (approx 23cm x 15cm)
- Banneton liner and linen cloth to cover or 1 x thin linen cloth to line the banneton and cover the dough
- Lame (a specially-designed razor blade to score/cut the dough)
- Baking paper (to transfer the dough to the casserole)
- Ice cubes x 2
- Cast iron lidded casserole (to bake the bread)
- Oven gloves
- Trivet
- Cooling rack
Method:
STEP 1 (Click Here For Film 1)
Measure out the flour into a large mixing bowl. Make a well in the centre. Add the water and then the starter. Using your fingers, mix the starter into the water. Gradually draw in the flour as you mix. Press the flour into the dough until all the flour is incorporated.
Cover with a damp cloth and rest for 2 hoursSTEP 2 (Click Here For Film 2)
Add salt dissolved in 10g of water. Mix for a few minutes only - until the dough is consistently smooth.
Cover and rest for 30 minutes.STEP 3 (Click Here For Film 3)
Perform a gentle stretch and fold.
At the end of this process, place into a square or rectangular glass/ceramic dish and cover with your cloth/food cover.
Rest for 30 minutes.STEP 4 (Click Here For Film 4)
Perform coil fold #1.
Cover and rest for 30 minutes (or until it has spread)STEP 5 (Click Here For Film 5)
Do coil fold #2.
Cover and rest for 30 minutes (or until it has spread)STEP 6 (Click Here For Film 6)
Do coil fold #3.
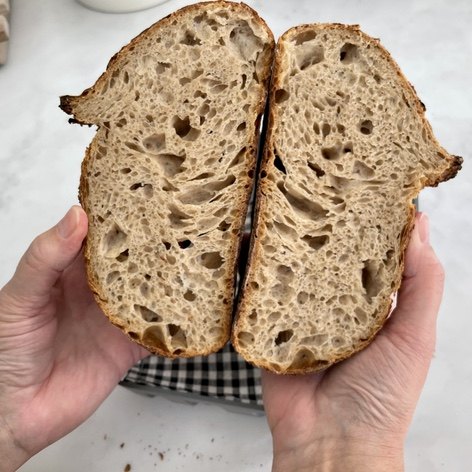
Cover and rest for 30 minutes (or until it has spread)SIGNS OF FERMENTATION
As you work through these coil folds, you will notice the dough changing as it ferments.
You should see:
- an increase in the volume of the dough (look for around 30% by coil 4)
- the texture of the dough is lighter and puffier
- there are bubbles on the surface of the doughSTEP 7 (Click Here For Film 7)
Do the final coil fold.
Once you have coiled the dough, take it out of the bowl and place on your work surface. Cover it with your upturned bowl and leave for 20 minutes, or until it has relaxed (ie spread out a little).STEP 8 (Click Here For Film 8)
Shape using the ‘fold and roll’ methodPlace the dough into your lined banneton (size 23cm x 15cm) and cover.
STEP 9 (Click Here For Film 9)
Leave to rise at room temperature until the dough has risen to the top of the banneton and is slightly domed. This will take approximately 1 hour.STEP 10
Once risen, place (covered) on the bottom shelf of your fridge overnight.Is it proofed?
You can test whether the dough is proofed by gently pressing the dough with a finger. If it is ready, the mark you have made will slowly rise back up, leaving behind a small indentation.Next day
Preheat oven (with your empty casserole in it) at 250°C for 1 hour.STEP 11 (Click Here For Film 10)
Prepare a piece of baking paper, on to which you will turn out your dough and use to transfer it to a lidded casserole.STEP 12 (Click Here For Film 11)
When the oven is hot, remove the dough from the fridge. Place the baking paper over the top of the banneton and gently turn the dough out onto it.
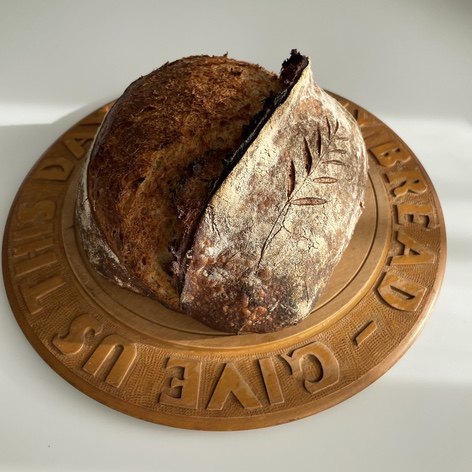
Score once with a long cut, keeping the lame at a low 45° angle. Decorate according to taste (for example, flour a decoration on the dough using a stencil, stick dried edible flowers on the surface using a flour and water 'glue', dust the surface with fine semolina/rice flour and score a little ear of corn - or simply dust and have a lovely natural crust).
Keeping the dough on the baking paper, place it into your casserole. Place an ice cube under the baking paper at either end. Put the lid on and place in the oven.
STEP 13 (Click Here For Film 12)
Bake for 20 mins at 250°C then remove the lid.STEP 14 (Click Here For Film 13)
Bake at 220°C for 15 minutes.
Remove from the casserole and place on a cooling rack. The bread is still cooking when you first take it out of the oven so leave to rest for 1-2 hours before eating.Enjoy!
- 16th February 2021

Stay in Touch
Get the latest news, promotions, recipes and product information from Sharpham Park and make sure you don't miss a thing!
Sign up and receive 15% off your next order
![]()
![]()
![]()